
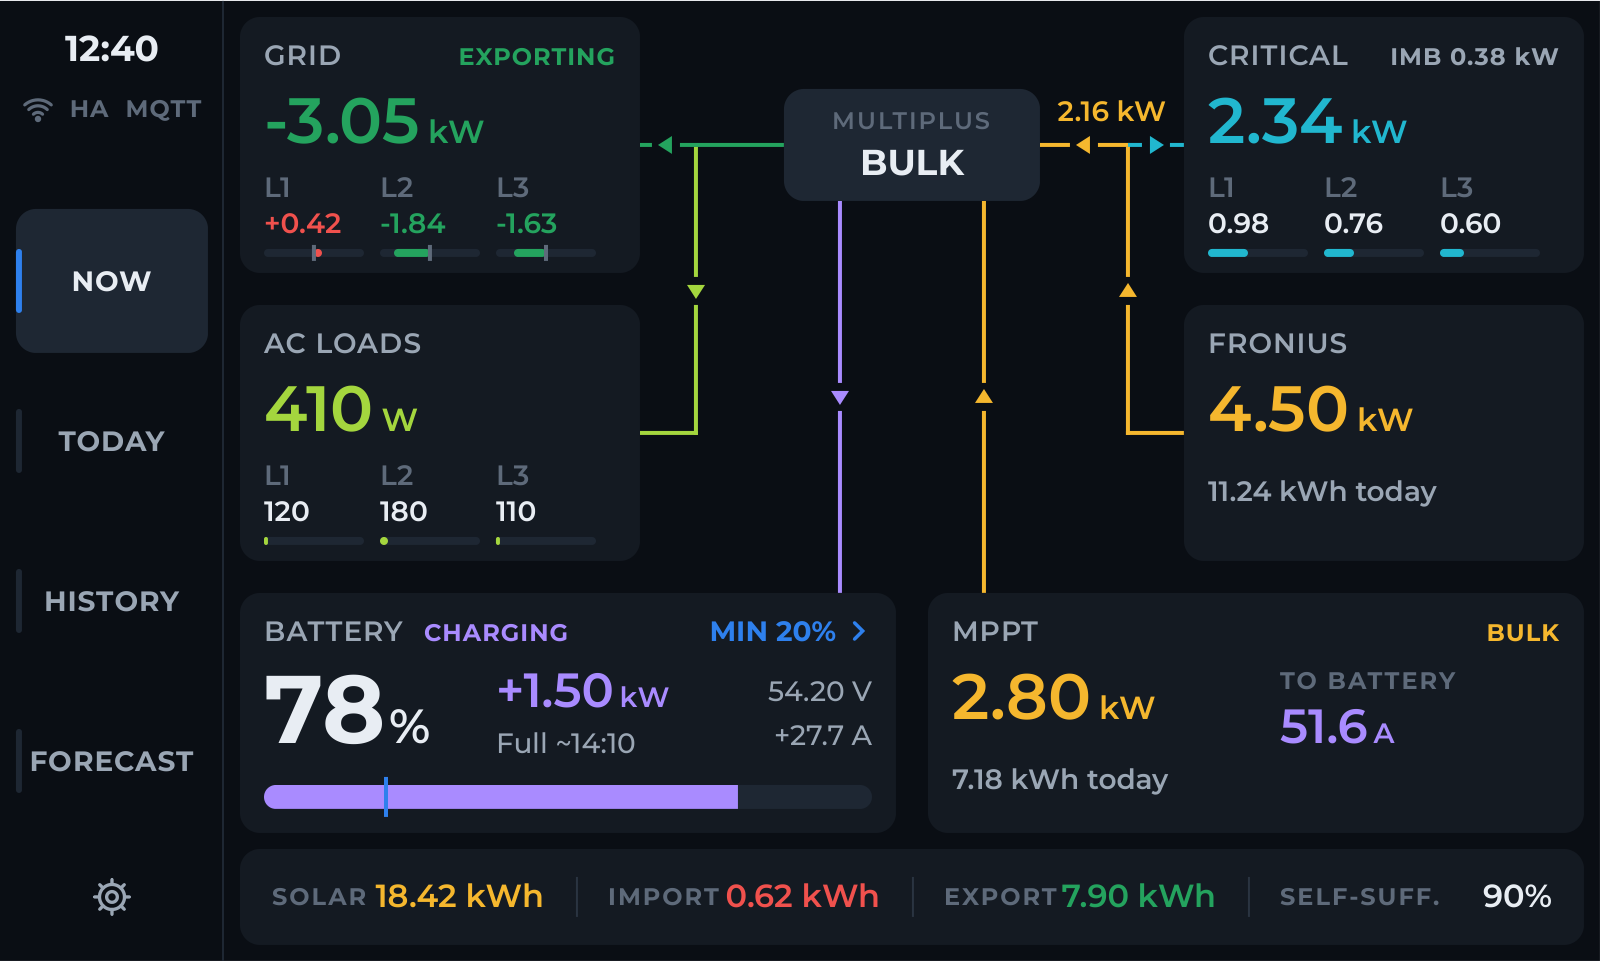
If you already use a Victron GX device such as a Cerbo GX to manage your solar and battery installation, a large amount of useful real-time data is already available locally: grid power, battery status, solar production, AC loads, MPPT production and, where installed, data from AC-coupled solar inverters such as Fronius.
The Clevr Victron Panel integration for Home Assistant turns that data into a clean set of Home Assistant sensors that can be used by the Clevr GX Panel, dashboards, automations and other Home Assistant devices.
Unlike older installations based on manually created YAML sensors, the Clevr integration automatically discovers the equipment connected to your GX system and lets you review the detected configuration before creating the sensors.
There is no need to modify configuration.yaml.
What the Clevr Victron Integration Does
The integration connects to your existing Victron GX MQTT data through Home Assistant's MQTT integration.
During installation it discovers the Victron equipment available on the GX system, including supported:
| Data source | Examples |
|---|---|
| Victron system | Grid, AC loads and system power |
| Battery | Charge and discharge energy |
| MPPT solar chargers | Victron SmartSolar and other GX-connected chargers |
| AC solar inverters | Fronius and other inverters exposed by GX as PV inverters |
| Grid meters | Grid import and export energy |
| Home Assistant Recorder | Hourly, daily and historical energy data |
The integration also creates aggregated solar sensors and special history feeds used by the Clevr GX Panel.
Home Assistant remains responsible for storing the historical information. This means the Clevr display can be switched off or restarted without losing the energy history already recorded by Home Assistant.
Before You Start
You will need:
- Home Assistant with the MQTT integration configured (see Connect Home Assistant MQTT to a Victron GX if you have not set this up yet)
- A Victron GX device accessible through MQTT
- The GX VRM Portal ID
- The Clevr Victron integration package, downloaded from Clevr House (you will find the download in the Clevr GX Panel configurator)
Your Victron MQTT data must already be available to the MQTT broker used by Home Assistant.
A typical bridged installation will expose Victron topics similar to:
victron/N/<portal-id>/...
and allow Home Assistant to send read requests back through:
victron/R/<portal-id>/...
The N/ topics carry notifications and data from the GX device. The R/ topics allow the integration to request fresh information and keep the GX MQTT data stream active.
The Clevr integration uses these read requests automatically. It does not send Victron W/ write commands and does not change settings on your GX system.
If your MQTT broker uses a prefix other than victron/, make a note of it because you will need it during setup.
Installing the Integration
- Create a Home Assistant backup. Before adding any custom integration, we recommend creating a Home Assistant backup from Settings → System → Backups.
- Download and extract the Clevr package. After downloading the integration, extract the ZIP file on your computer. Inside you will find
config/custom_components/clevr_victron. - Copy the integration into Home Assistant. Copy the complete
clevr_victronfolder into/config/custom_components/. The final structure should look like/config/custom_components/clevr_victron/manifest.json.You can transfer the files using whichever method you normally use to access your Home Assistant configuration, such as Studio Code Server, Samba or SSH/SCP. Be careful not to create an extra directory level such as
/config/custom_components/clevr_victron/clevr_victron/. - Restart Home Assistant. A complete Home Assistant restart is required after installing the files.
- Add the Clevr integration. Open Settings → Devices & services, select Add Integration, search for Clevr Victron Panel, and select it.
- Enter your MQTT settings. The integration asks for two values: the MQTT bridge prefix and the GX Portal ID.
For a common installation where the Victron GX is bridged into the Home Assistant MQTT broker below
victron/, entervictron/as the MQTT bridge prefix. If Home Assistant is connected directly to the GX MQTT broker and the topics begin directly withN/, leave the prefix empty.The GX Portal ID uniquely identifies your Victron installation.
- Let Clevr discover the GX installation. Once you continue, Clevr requests a fresh data set from the GX device and examines the available equipment. The scan looks for the system, VE.Bus equipment, battery devices, grid meters, Victron solar chargers and AC PV inverters.
- Review the detected equipment carefully. The next screen is intentionally not fully automatic. Solar equipment can disappear from the GX data when it is offline, so Clevr asks you to confirm what was found.
Select the correct Grid energy meter, Battery energy meter, and all installed Solar devices. Then confirm which phases are actually present for Grid, AC input loads, and AC output loads.
Perform the initial discovery during daylight whenever possible, with all solar inverters and MPPT equipment online. An inverter producing zero watts can still be a valid installed device, while an inverter that is completely offline may not appear at all.
- Review the energy-source warnings. Before creating the sensors, Clevr shows how each energy value will be obtained. Whenever the GX exposes a suitable native energy counter, Clevr uses it. When an appropriate native grid or battery energy counter is not available, the integration can create a clearly identified estimated energy sensor based on measured power. Review these warnings before continuing.
- Create the sensors. Confirm the final screen and Home Assistant will create a new Clevr GX device together with the discovered sensors and calculated data feeds.
- Verify the values. Open the newly created Clevr GX device in Home Assistant and compare the displayed values with your Victron GX interface. You should also check Developer Tools → States and Developer Tools → Statistics to confirm that the energy sensors are being recorded correctly.
What Sensors Are Created?
The exact set depends on the equipment discovered in your installation.
For example, a system containing Victron MPPT chargers and a Fronius inverter may produce separate source sensors together with several aggregated Clevr sensors.
Important panel-facing data includes:
| Sensor type | Purpose |
|---|---|
| MPPT Power | Combined instantaneous output of the selected Victron MPPT chargers |
| AC PV Power | Combined power from AC-connected PV inverters such as Fronius |
| AC PV Output Power | PV generation connected specifically to the GX AC output side |
| Grid Import / Export Energy | Energy imported from and exported to the grid |
| Battery Charge / Discharge Energy | Energy flowing into and out of the battery |
| Energy Snapshot | Compact energy information used by the Clevr display |
| History Snapshot | Recorder-based hourly and multi-day history for the Clevr display |
Where several solar chargers are installed, Clevr can combine them automatically instead of requiring the display firmware to know each individual device ID.
This is particularly useful when a system is expanded later with additional MPPT chargers.
Native and Estimated Energy Sensors
Clevr always prefers energy counters reported directly by the equipment.
Sometimes, however, a GX installation exposes instantaneous power but does not provide an appropriate cumulative energy counter for a particular role. In those situations Clevr can derive an estimated energy counter from the measured power.
Estimated sensors are deliberately identified as such.
There is one important difference: an estimated counter can only accumulate energy while Home Assistant is running and receiving data. If Home Assistant is offline for an hour, the integration does not invent or interpolate the missing consumption for that hour.
Native device counters are therefore preferred whenever they are available.
Historical Data and Home Assistant Recorder
The Clevr GX Panel does not need to store its own long-term energy database.
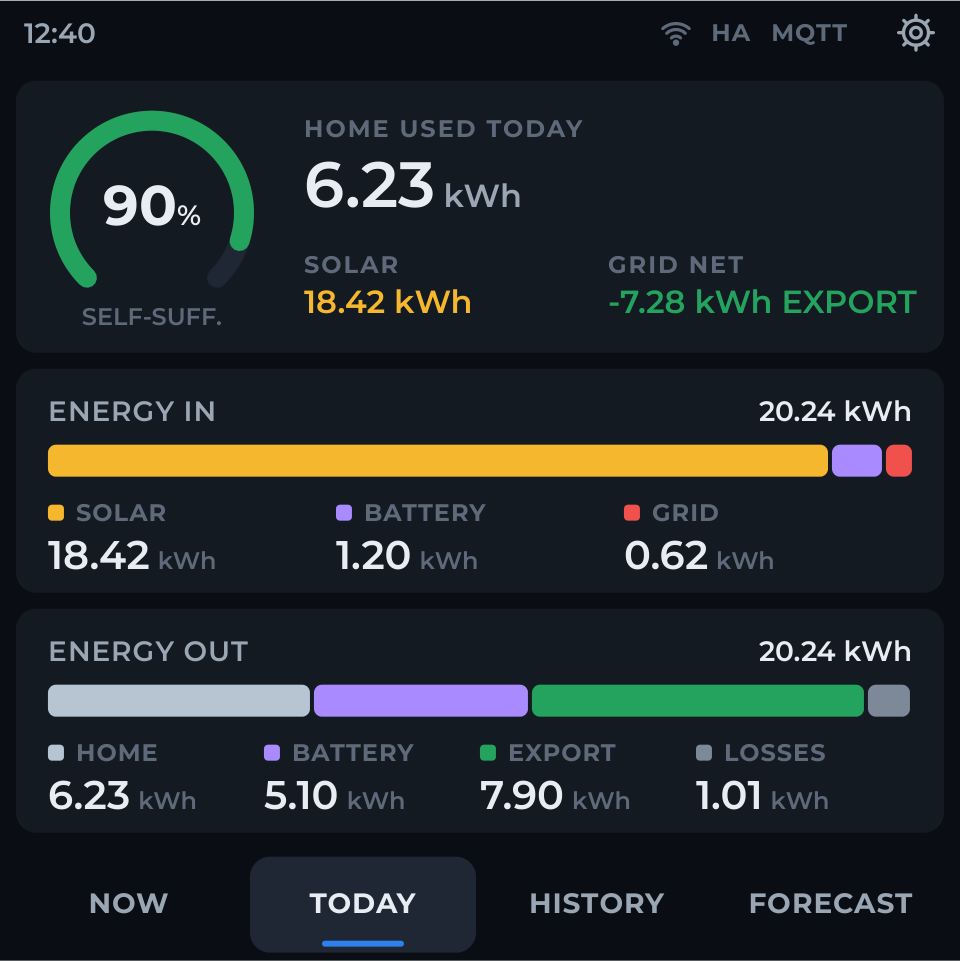
Instead, Clevr uses Home Assistant Recorder statistics to prepare the hourly and daily history displayed on the panel.
This has several advantages. The display can reboot without losing history, multiple displays can use the same data, and historical information remains centrally managed by Home Assistant.
If you use a custom Recorder include configuration, make sure the newly created Clevr energy sensors are included.
Also remember that installing the integration today cannot recreate hourly Home Assistant statistics from before the sensors existed. The first day after installation may therefore contain only partial history.
Download the Clevr Diagnostics File
Once the installation is working correctly, download the integration's Diagnostics file from Home Assistant.
This file is especially useful when configuring a Clevr GX Panel because it contains the information required to identify the discovered installation, including the equipment inventory, selected energy sources, phase configuration and the actual Home Assistant entity IDs created on your system.
The diagnostics export does not contain your MQTT username or password.
Keep this file if your Clevr GX Panel will be prepared specifically for your installation.
Troubleshooting: “No Fresh GX Data”
If Clevr reports No fresh GX data, the integration is installed correctly, but Home Assistant is not receiving the GX data required for discovery.
Check that Home Assistant's MQTT integration is connected and verify the Portal ID and MQTT prefix.
If you use an MQTT bridge, it must work in both required directions:
- GX → Home Assistant for the
N/data tree - Home Assistant → GX for
R/read requests
For example, if Home Assistant receives victron/N/<portal-id>/system/0/..., it must also be possible to send victron/R/<portal-id>/keepalive back to the GX device.
Clevr automatically sends these keepalive requests while the integration is running.
A Solar Inverter Is Missing
If a Fronius or another PV inverter does not appear during discovery, first check whether it is currently visible on the GX device.
Solar equipment should preferably be discovered during daylight with every inverter powered and communicating.
Do not assume that a device is absent simply because its power is currently zero. Conversely, a completely offline inverter may not appear in the discovery data at all.
Correct the communication problem first and then repeat the Clevr integration setup.
Energy or History Is Unavailable
An unavailable energy value does not necessarily indicate an installation problem.
Some Victron devices or connection methods simply do not expose the native energy counters required for that measurement.
Clevr deliberately avoids fabricating historical information when the source data is incomplete.
For Recorder-based history, also verify that the corresponding sensors are being recorded by Home Assistant and have not been excluded by a custom Recorder configuration.
Local by Design
The data path used by the Clevr integration can remain entirely inside your local network.
Home Assistant communicates with the MQTT broker already configured for the installation, and the integration uses the local GX data exposed through that broker.
The integration also limits itself to reading the data needed for discovery, energy accounting and the Clevr display. It does not use MQTT write commands to alter Victron settings.
From Home Assistant to the Clevr GX Panel
Once the integration is installed and the detected values have been verified, Home Assistant becomes the stable data layer between your Victron installation and the Clevr GX Panel.
The panel can use the Clevr-generated solar aggregates, energy information and Recorder-backed history without requiring every customer installation to have exactly the same Victron or Fronius device IDs.
That means a system with one MPPT, several MPPT chargers, an AC-coupled Fronius inverter, different grid meters or different phase configurations can all be represented through the same Clevr display interface.
Install the integration once, review what Clevr discovers, and let Home Assistant provide a consistent interface to the rest of the Clevr ecosystem.
Ready for the panel? The Victron GX Replacement – 4 inch uses exactly this integration. Press Configure, upload your diagnostics file, and your panel code is built for your installation.